CFMOTO UForce U10 EMP Rear Bumper Installation Guide
✓ UForce U10 Highland
✓ UForce U10 XL Pro
✕ Standard UForce 1000 — that machine needs EMP P/N 14890
Shop This Bumper — Part 15113 / 15243 →
This is a bed-dumping bumper, and that one fact explains almost every problem people run into with it. The brackets bolt to the underside of the cargo bed, not to the vehicle chassis — so the mounting holes you're looking for aren't where you expect them to be.
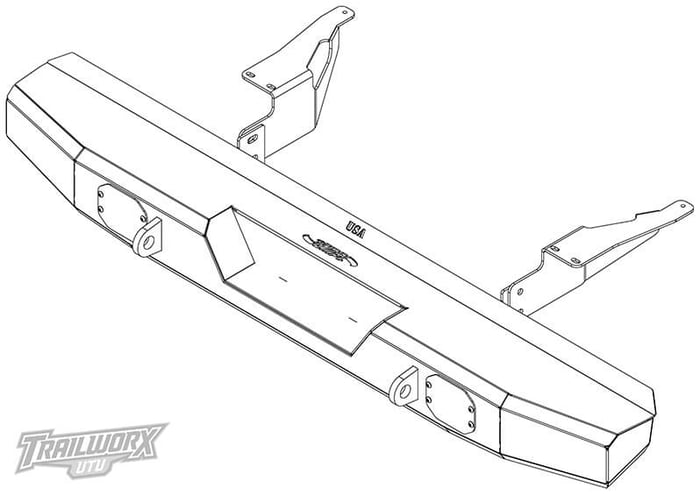
EMP Bumper — Part 15113 / 15243.
Before You Start
Do not tighten any hardware until the final step. Leaving every bolt loose is what lets the brackets and bumper shell line up. Tighten as you go and the geometry locks before the bumper is on.
This bumper fits the U10, U10 Highland and U10 XL Pro only. The standard UForce 1000 uses a different chassis and bed frame and takes EMP P/N 14890 instead. The badges look similar — if you're unsure which machine you have, call or text us before you order.
Required Tools
- 13mm socket and wrench
- 9/16" socket and wrench
- Screwdriver — for popping out factory plugs and push-pins
Installation Steps
1 Locate the hidden factory holes
Don't look at the lower frame near the exhaust or trailer hitch. Pull the latch and tilt your cargo bed all the way up, then look straight up at the underside of the plastic bed floor framework — the factory threaded steel inserts are hidden inside the recessed structural channels. Depending on model year, these holes may be covered by plastic shipping plugs, push-pins, or a thin heat-shield plate. Pop these out to reveal the threaded inserts underneath.
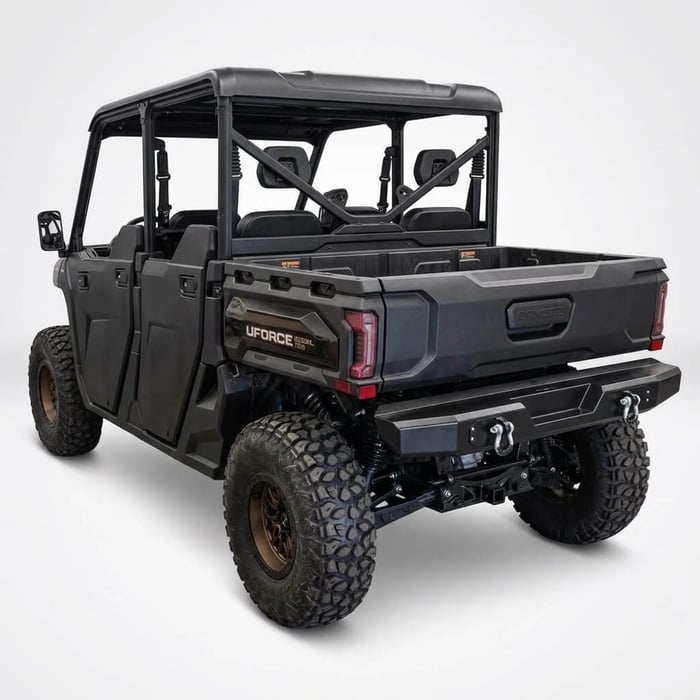
Bed down — normal riding position.
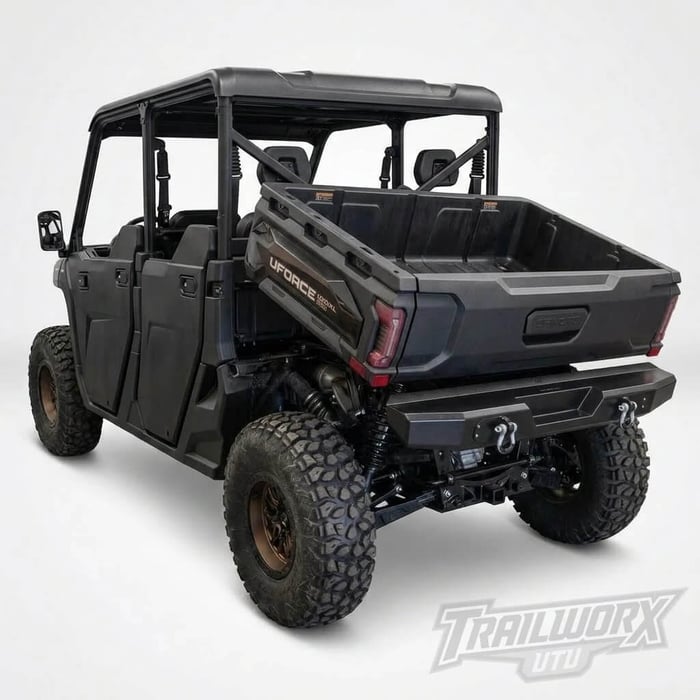
Bed tilted up — this is where you access the hidden factory holes.
2 Mount the brackets to the bed separately
Don't bolt the brackets to the bumper shell on the floor. Hold the loose EMP mounting brackets directly up to the underside of the tilted bed frame and hand-turn the provided bolts into the factory inserts — leave them loose enough that the brackets can easily wobble.
3 Attach the bumper shell
Lift the metal bumper shell up to meet the loosely hanging brackets. Line up the internal bumper tabs with the bracket slots, insert the carriage bolts through the front face of the bumper into the brackets, and spin the nuts on by hand.
4 Align and tighten
Lower the dump bed completely and close your tailgate. Move the bumper along its slotted tracks until it sits level with equal clearance under the tailgate. Fully tighten the bracket-to-bed bolts first, then tighten the bumper-to-bracket nuts.
5 Final test
Flip the dump bed up and down a few times and confirm the outer edges cleanly clear your rear tires and exhaust shields.
Accessories & Features
Flush-Mount LED Lights
Adding cube lights? Unbolt the blank steel covers on the bumper face before mounting it to the brackets, drop your pods into the pre-cut slots, and run wiring along the dump bed hinges. Far easier before the bumper is up than after.
D-Ring Shackle Mounts
The integrated 3/8" steel shackle mounts accept standard 3/4" D-rings, giving you rated recovery points on both sides of the bumper.
Troubleshooting & FAQ
Why do my EMP bumper brackets not line up with any holes on my U10 frame?
You're likely looking at the stationary lower chassis frame near the exhaust or trailer hitch. This is a bed-dumping style bumper — you must fully tilt the dump bed open and look straight up at the underside of the plastic cargo bed framework itself. The brackets bolt to the bed frame rails, not the vehicle chassis.
I tilted the bed, but there are still no threaded holes visible. What do I do?
CFMOTO often covers these factory threaded inserts with plastic shipping plugs, factory push-pins, or a thin aluminum heat-shield plate depending on your model year. Use a screwdriver to pop out any plastic pins or plugs in the recessed channels beneath the bed to reveal the hidden factory threads underneath.
The holes match, but the bolts are binding and won't go in straight. How do I fix this?
If you bolted the brackets tightly to the metal bumper shell while sitting on the garage floor, the geometry will lock up. Completely separate the brackets from the bumper shell and bolt the loose brackets to the underside of the tilted bed first by hand — leave them loose enough to wobble. Only after they're hanging from the bed should you lift the bumper shell up to match them.
Does this bumper fit the standard CFMOTO UForce 1000?
No. The standard UForce 1000 uses a completely different chassis and bed frame layout. This guide and part number (15113 / 15243) are strictly for the UForce U10, U10 Highland and U10 XL Pro models. The standard UForce 1000 requires EMP Part #14890.
Does the bed still dump with this bumper installed?
Yes — it's built to tilt with the bed. That's what step 5 is confirming.
Installed on a Real Machine
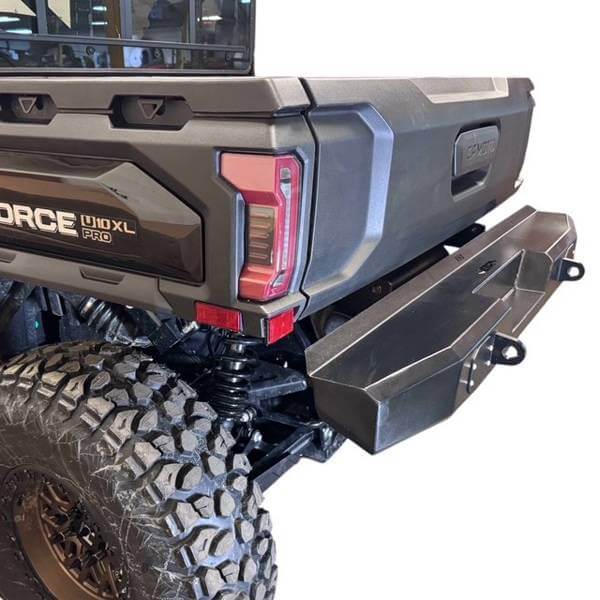
Our own photos of this bumper on a customer's UForce U10 XL:
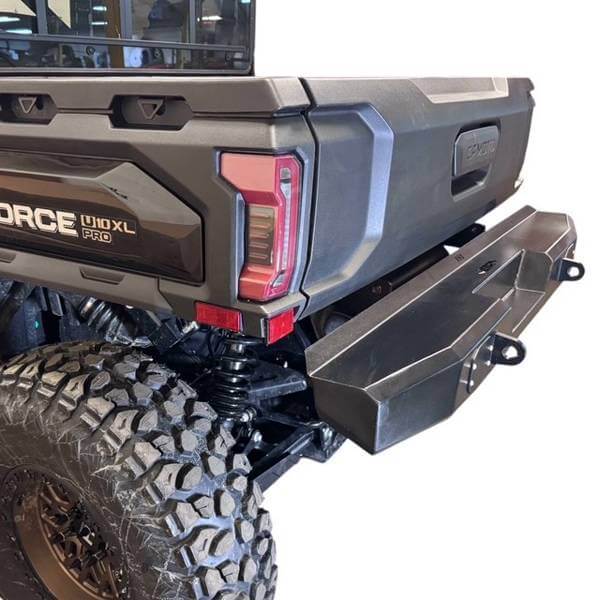
Installed — CFMOTO UForce U10 XL.
Direct Resource Links
→ Bumper Info & Replacement Hardware — Trailworx UTV CFMOTO U10 Rear Bumper Page
→ More Parts & Upgrades — Trailworx UTV CFMOTO Parts Catalog
Not sure this is the right bumper for your machine? Call 430-258-6189 or email sales@trailworxutv.com with your year and model and we'll confirm the fit before you order.