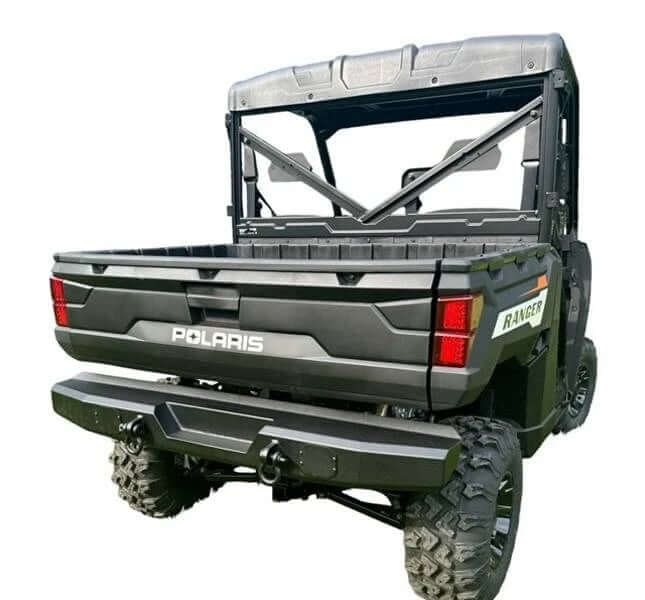
Honda Pioneer 1000-6 EMP Rear Bumper: Full Install Guide (P/N 15029)
Table of Contents
✕ Pioneer 1000-5 — that machine needs EMP P/N 13140
✕ Pioneer 700 — that machine needs EMP P/N 12494
⚠ Requires drilling — see warning below
Shop This Bumper — Part 15029 →
This one is a bigger job than most bolt-on bumpers, and it's worth knowing that before you start rather than halfway through. The brackets mount on the tailgate pivot pins, which means the rear side panels, the rear door and the tail light all have to come off first — on both sides. Then you drill the frame. Set aside an afternoon, not a lunch break.
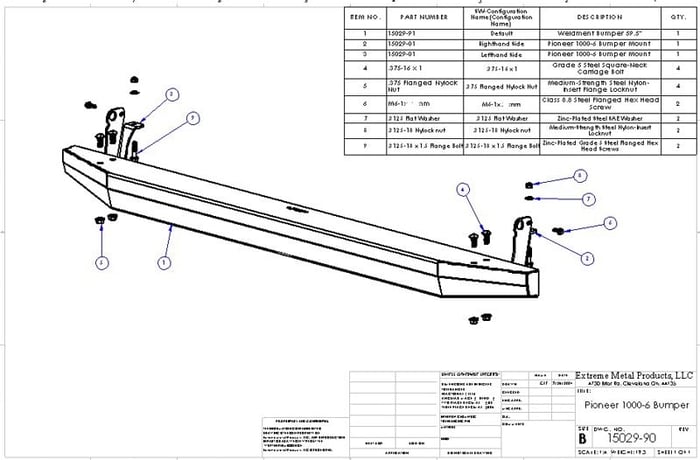
Exploded view — bumper, mounts and hardware.
Before You Start
Step 8 has you drilling a 1/4" hole through the frame tube on each side. That is permanent and it cannot be undone. Some listings for this bumper describe it as installing in minutes with no cutting — that is not accurate for the 15029, and we would rather you heard it from us than found out with the machine half apart. If you aren't comfortable putting a bit through your frame, call us before you order and we'll talk through what else fits your machine.
This is the six-seat Pioneer 1000-6 only. The 1000-5 takes EMP P/N 13140 and the Pioneer 700 takes P/N 12494 — different bumpers, different brackets, not interchangeable. If you're unsure which machine you have, send us the year and model and we'll confirm before you order.
Disconnect the battery before you pull the tail light connector, and keep the two Phillips screws and the light somewhere safe — they go back on at the end.
Required Tools
- Drill and a 1/4" bit
- Phillips screwdriver
- 10mm, 3/8", 7/16", 9/16" and 1/2" sockets and wrenches
- Somewhere clean to lay out panels, the rear door and the tail light
Check Your Hardware
- 2 × 5/16-18 x 1-1/2" flange bolts, 2 × 5/16-18 nyloc nuts, 2 × 5/16 flat washers
- 4 × 3/8-16 x 1" carriage bolts, 4 × 3/8-16 flanged nyloc nuts
- 2 × M6 x 16mm hex head bolts
- 1 × EMP logo decal
Installation Steps
1 Strip the inner side panel
Working one side at a time, remove the three Phillips screws from the side panel on the inside of the bed.
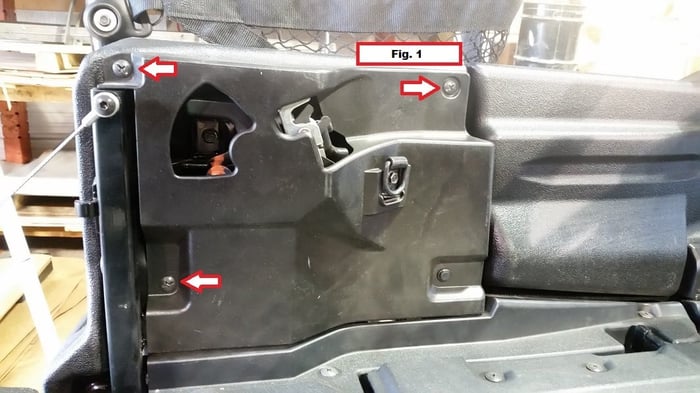
Fig 1 — three screws inside the bed.
2 Free the D-ring and the plastic panel
Take out the 10mm bolt holding the D-ring to the side panel, then the plastic body fastener. Open the rear door and lift the plastic side panel away.
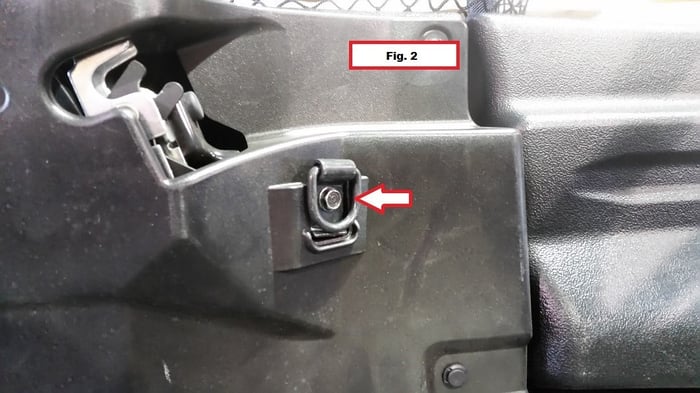
Fig 2 — D-ring bolt.
3 Remove the rear door
Four bolts hold the rear door on. Take all four out and set the door aside where it won't get stepped on.
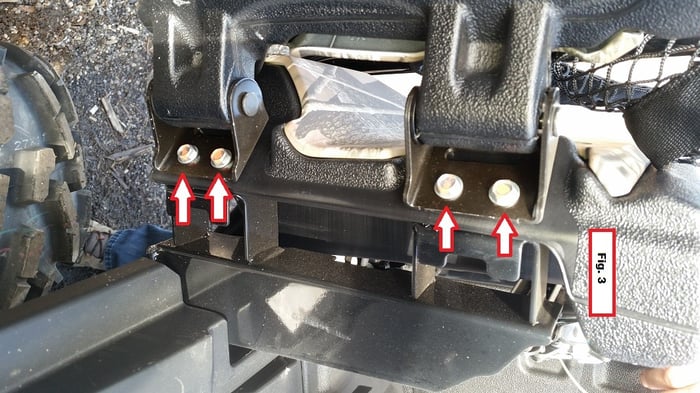
Fig 3 — rear door bolts.
4 Pull the tail light and the outer panel
Two Phillips screws release the tail light. Unplug it and set it aside. Then remove the last two 10mm bolts from the outer rear side panel and take the panel off.
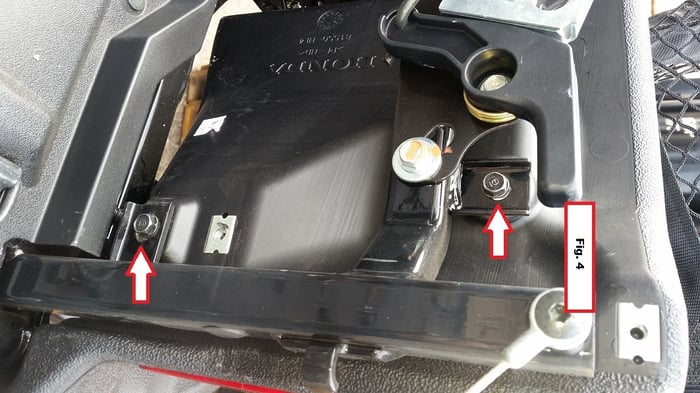
Fig 4 — outer panel bolts and tail light.
5 Remove the tailgate pivot bolt
There's a 10mm bolt in the pivot pin at the bottom of the tailgate. Take it out and discard it — it does not go back in. An M6 bolt from the kit replaces it. Now repeat steps 1 through 5 on the other side.
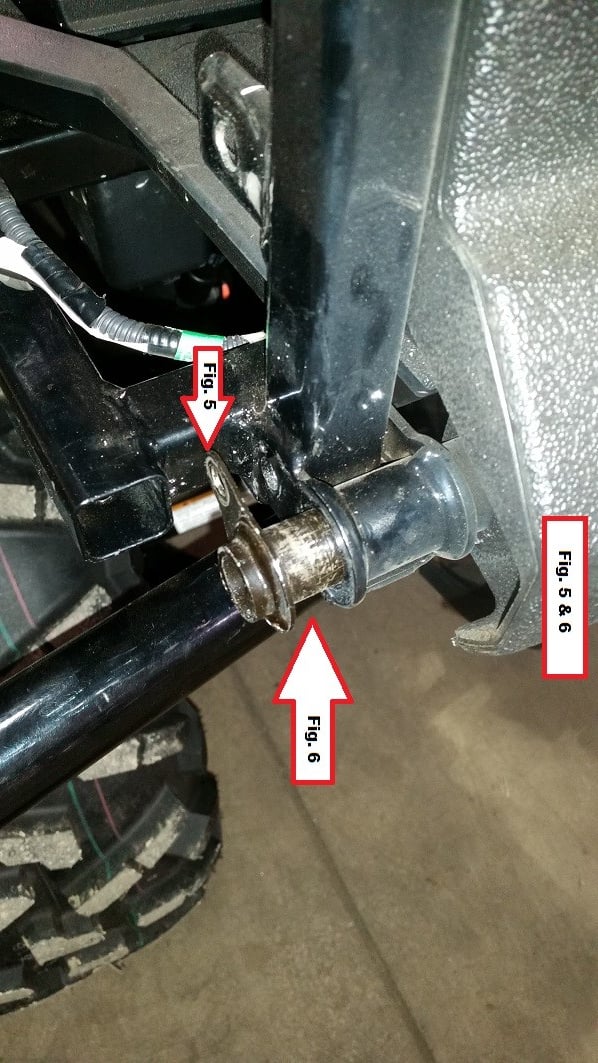
Figs 5 and 6 — the pivot pin, and the bracket sitting in position.
6 Fit the mounting bracket to the pivot
One side at a time, carefully draw the pivot pin out from the bottom of the tailgate and hold the mounting bracket in position. Push the pivot back through the bracket and into the tailgate.
7 Secure the bracket
Lock the bracket and pivot in place with one of the provided M6 x 16mm bolts.
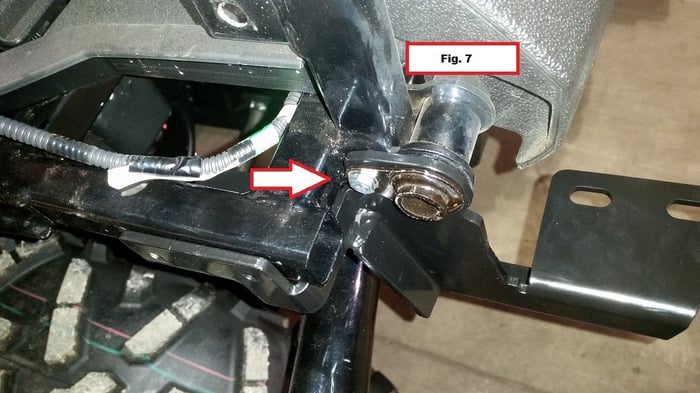
Fig 7 — M6 bolt through the bracket and pivot.
8 Drill the frame tube
Using the 1/4" bit, drill through one side of the frame tube and secure the bracket with a 5/16" flange bolt, flat washer and nyloc nut. Check what's behind the tube before the bit goes through — wiring and lines run in this area, and a drill that keeps going doesn't care what it finds.
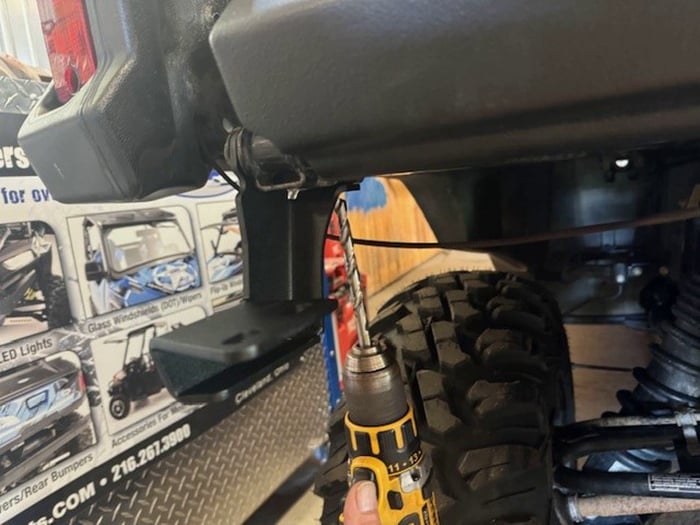
Fig 8 — drilling the frame tube.
9 Hang the bumper
With both brackets installed and tightened, lift the bumper onto them and secure it with the four 3/8-16 x 1" carriage bolts and flanged nyloc nuts.
10 Put it all back together
Reverse the prep: outer panels, tail light plugged back in, rear door, plastic side panels, D-rings. Reconnect the battery and check that the tail lights work before you go anywhere.
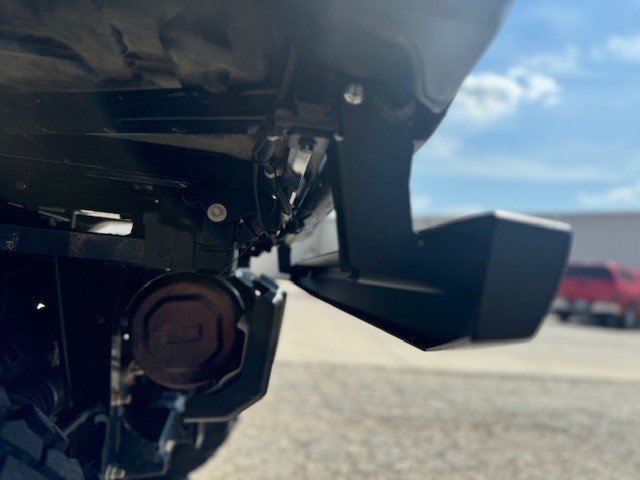
Fig 9 — bumper installed.
Troubleshooting & FAQ
Do I really have to drill?
Yes. The bracket is located by the tailgate pivot pin and then anchored to the frame tube, and that anchor point is a hole you make. There is no pre-drilled alternative on this bumper.
Why does so much have to come off just to mount a bumper?
Because the brackets pick up the tailgate pivot pins rather than bolting to the outside of the frame. Getting to those pins means the panels, door and tail light are in the way. It's more disassembly than most bumpers, and it's also why this one sits as tight to the machine as it does.
I lost the 10mm pivot bolt I was supposed to discard. Is that a problem?
No — it's meant to be thrown away. The M6 x 16mm bolt in the kit takes its place.
Will this fit my Pioneer 1000-5?
No. The 1000-5 uses EMP P/N 13140. The two machines are different lengths and the brackets don't cross over.
Does the bed still dump?
Yes. Cycle it a few times once everything is tightened and confirm the bumper clears through full travel before you load it up.
Direct Resource Links
→ Bumper Info & Replacement Hardware — Trailworx UTV Honda Pioneer-6 Rear Bumper Page
→ All Honda Pioneer Bumpers — Front and Rear
→ More Parts & Upgrades — Trailworx UTV Honda Pioneer Catalog
Not sure this is the right bumper for your machine? Call 430-258-6189 or email sales@trailworxutv.com with your year and model and we'll confirm the fit before you order.