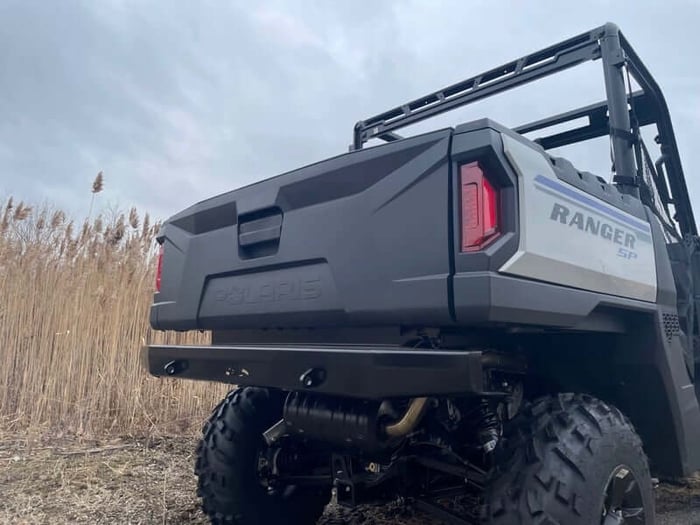
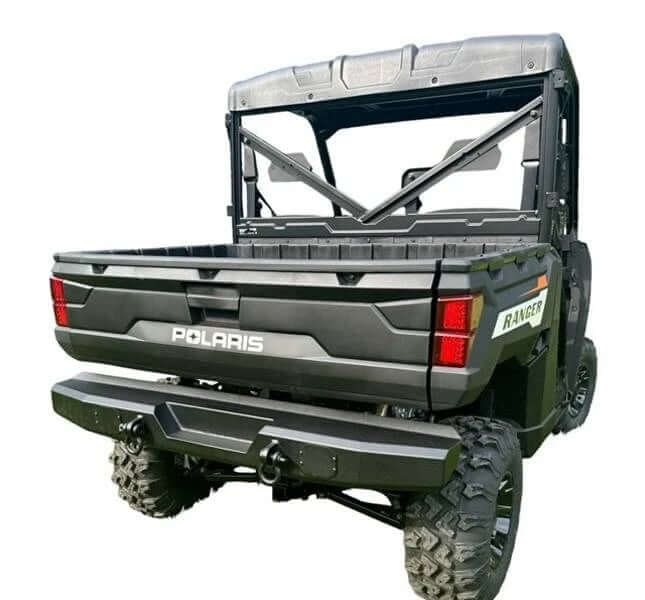
Polaris Ranger XP 1000 Extreme Rear Bumper: Full Install Guide (P/N 15008)
✓ Ranger 1000 non-XP (2020–2027)
✓ Crew / 4-door (2018–2027)
✕ 2018–2019 Ranger 1000 Diesel and older 900-style frames
✕ Oversized tires — see warning below
Shop This Bumper — Part 15008 →
The Extreme rear bumper for the full-size Polaris Ranger 1000 and XP 1000 is a bolt-on job. No drilling, no cutting, no welding. Most of the work is spent under the back of the machine hanging brackets, not wrestling the bumper itself.
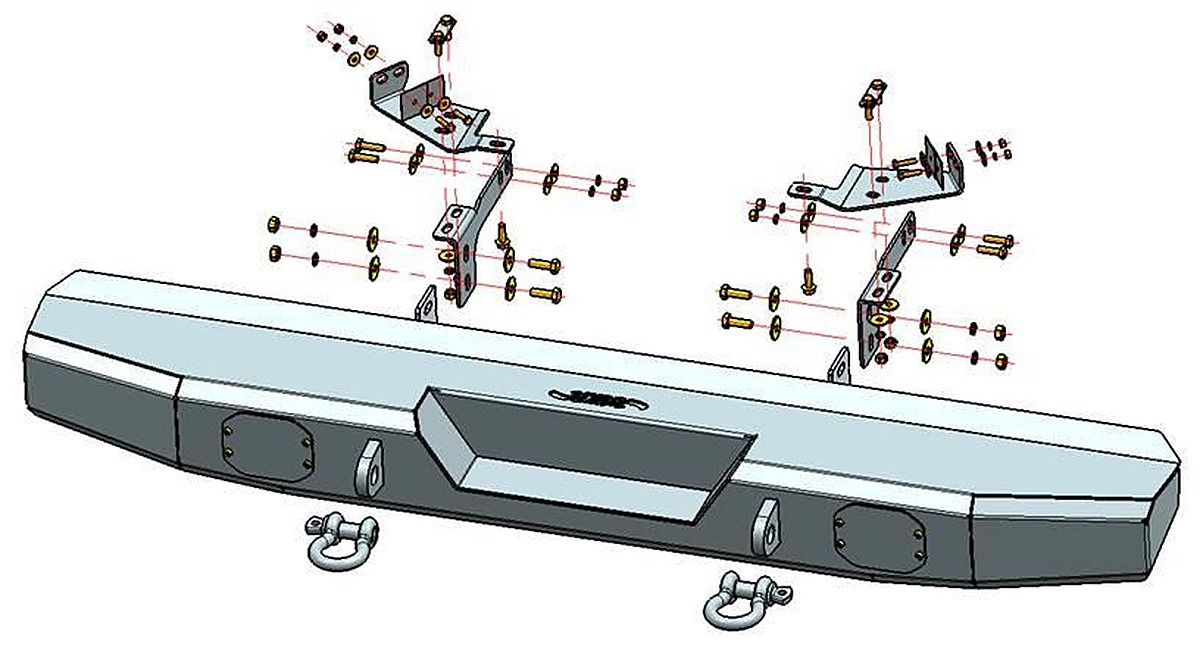
Exploded view — bumper, brackets and hardware.
Before You Start
Nothing gets tightened until the final step. Every bolt stays loose so the brackets and bumper can be shifted into alignment. Tighten as you go and the geometry locks up before the bumper is on.
The self-tapping bolts go in the rear crossmember and nowhere else. They have cutting edges that thread their own hole. Use one anywhere else in this install and you will chew up threads you needed.
On a lifted machine with larger-than-stock tires, the bumper will still bolt on, but the tires can contact it and the bed will not fully dump. This is the most common surprise with this bumper. If you are on anything bigger than stock, call or text us before you order and we will sort out whether this is the right bumper for your setup.
Let the exhaust cool. The passenger-side bracket goes in right next to it. If the machine has been running, give it time before you get under there.
Required Tools
- 10mm, 13mm and 17mm sockets and wrenches (covers the M6, M8 and M10 hardware)
- Ratchet with a short extension — several fasteners are in tight quarters
- A second wrench for the nut side of every bolt
- A helper — the bumper runs about 50 lbs
- Shop light or headlamp
Check Your Hardware
Lay it all out and count before you crawl under the machine:
- 1 rear bumper, 2 frame brackets, 2 support brackets, 2 8mm double bolt plates
- 2 × 8mm x 25mm self-tapping hex bolts (crossmember only)
- 4 × 8mm x 30mm hex bolts, 12 flat washers, 8 lock washers, 8 nuts
- 4 × 10mm x 30mm hex bolts, 8 flat washers, 4 lock washers, 4 nuts
- 4 × 6mm x 25mm hex bolts, 8 flat washers, 4 lock washers, 4 nuts
LED lights and shackles are not included.
Installation Steps
1 Assemble the driver-side support bracket
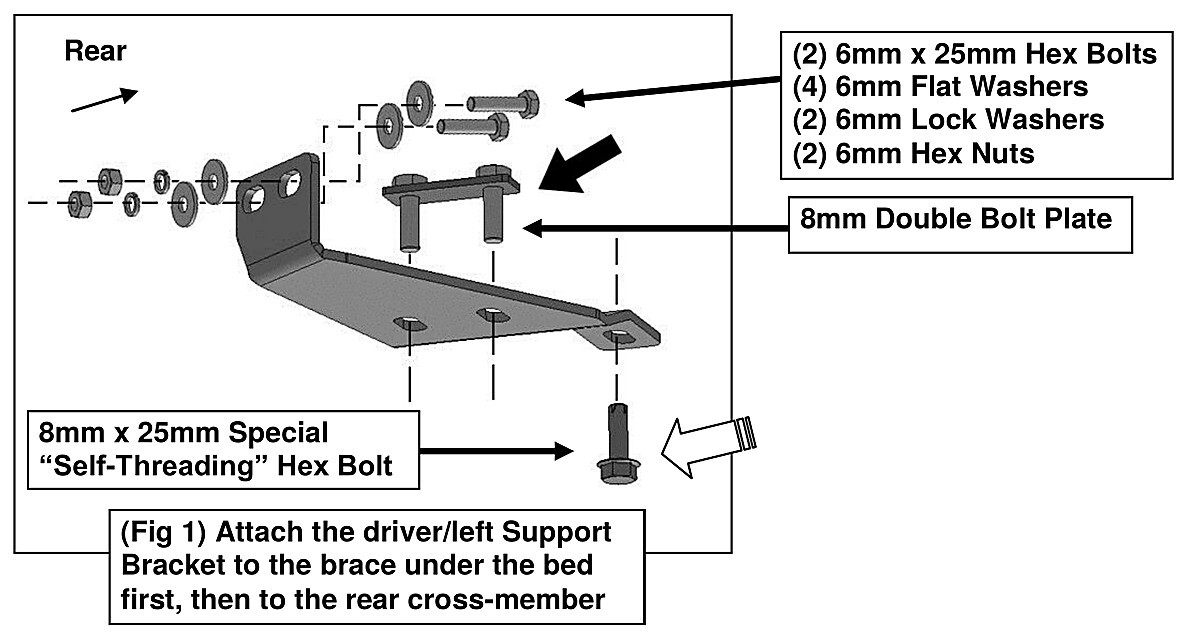
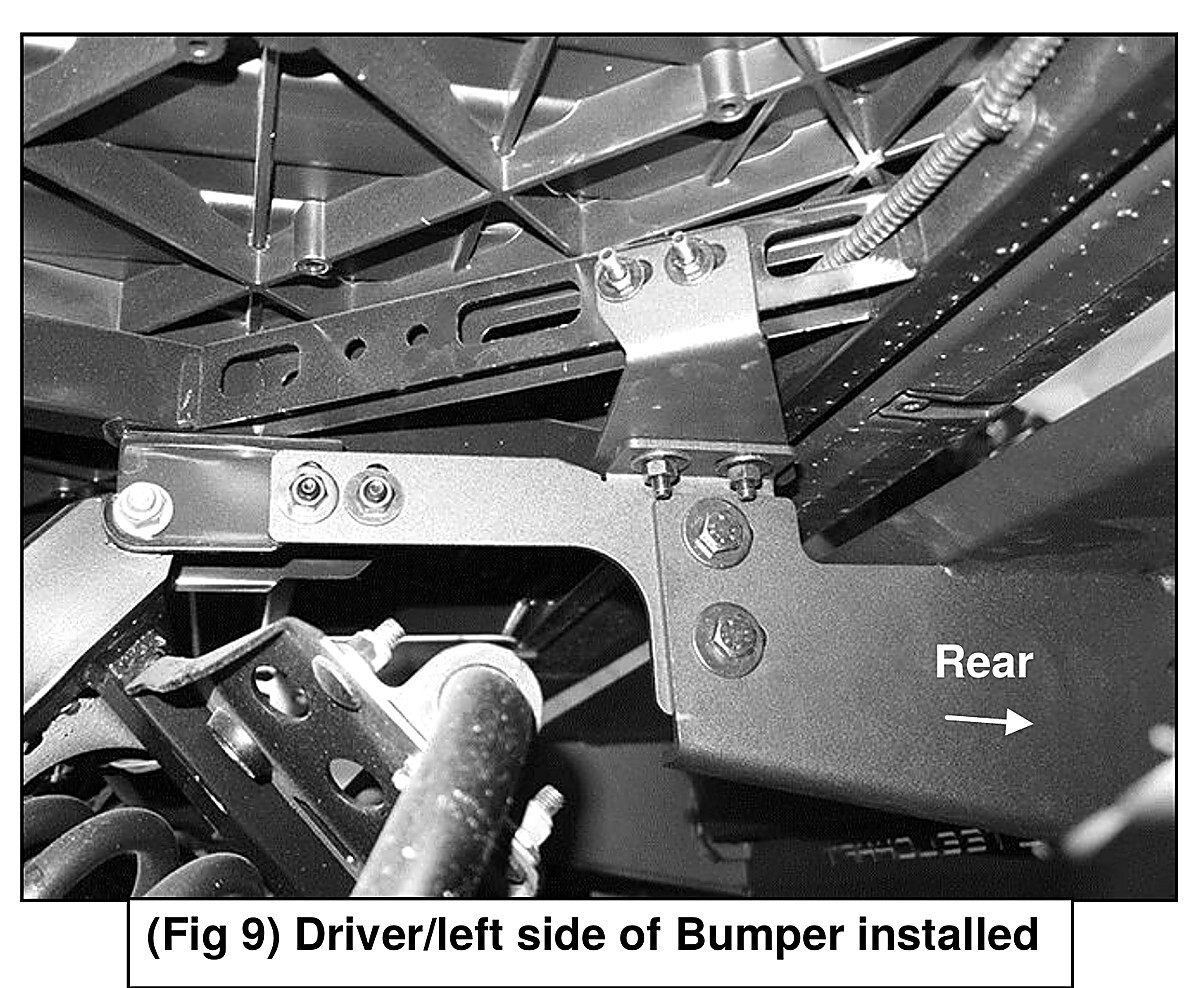
Take the driver-side support bracket and one 8mm double bolt plate. Drop the threaded studs of the plate down through the two center holes in the bracket. Hold it up under the frame to see how it sits — the front tab lands on the angled brace under the bed, and the single bent tab reaches back to the rear crossmember.
2 Bolt it to the bed brace and crossmember
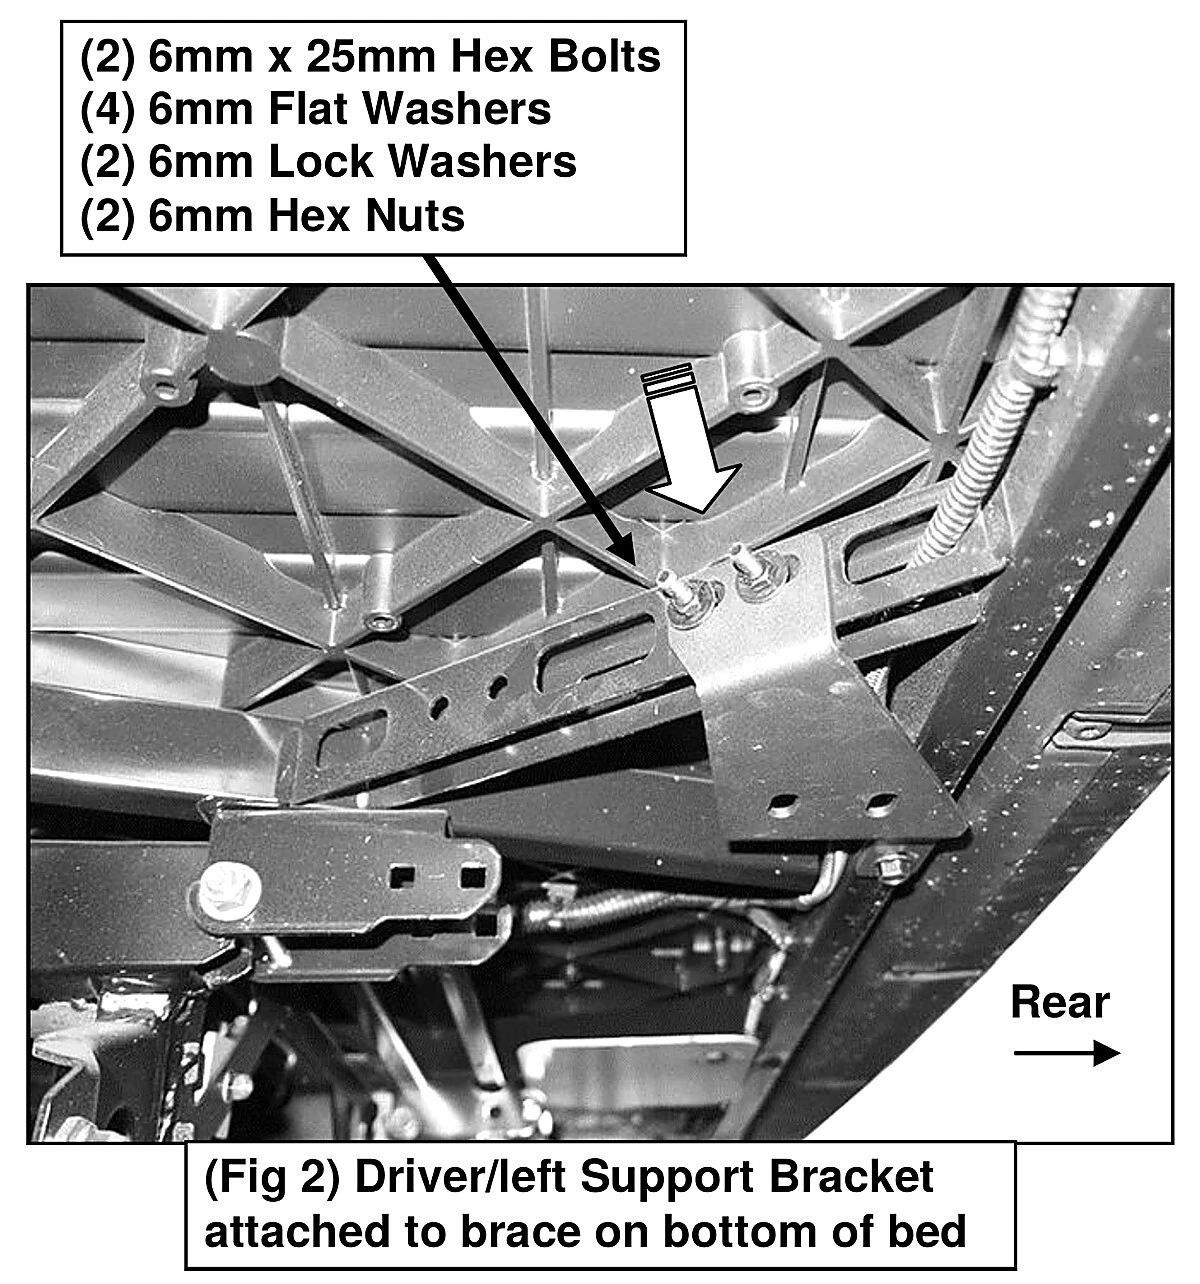
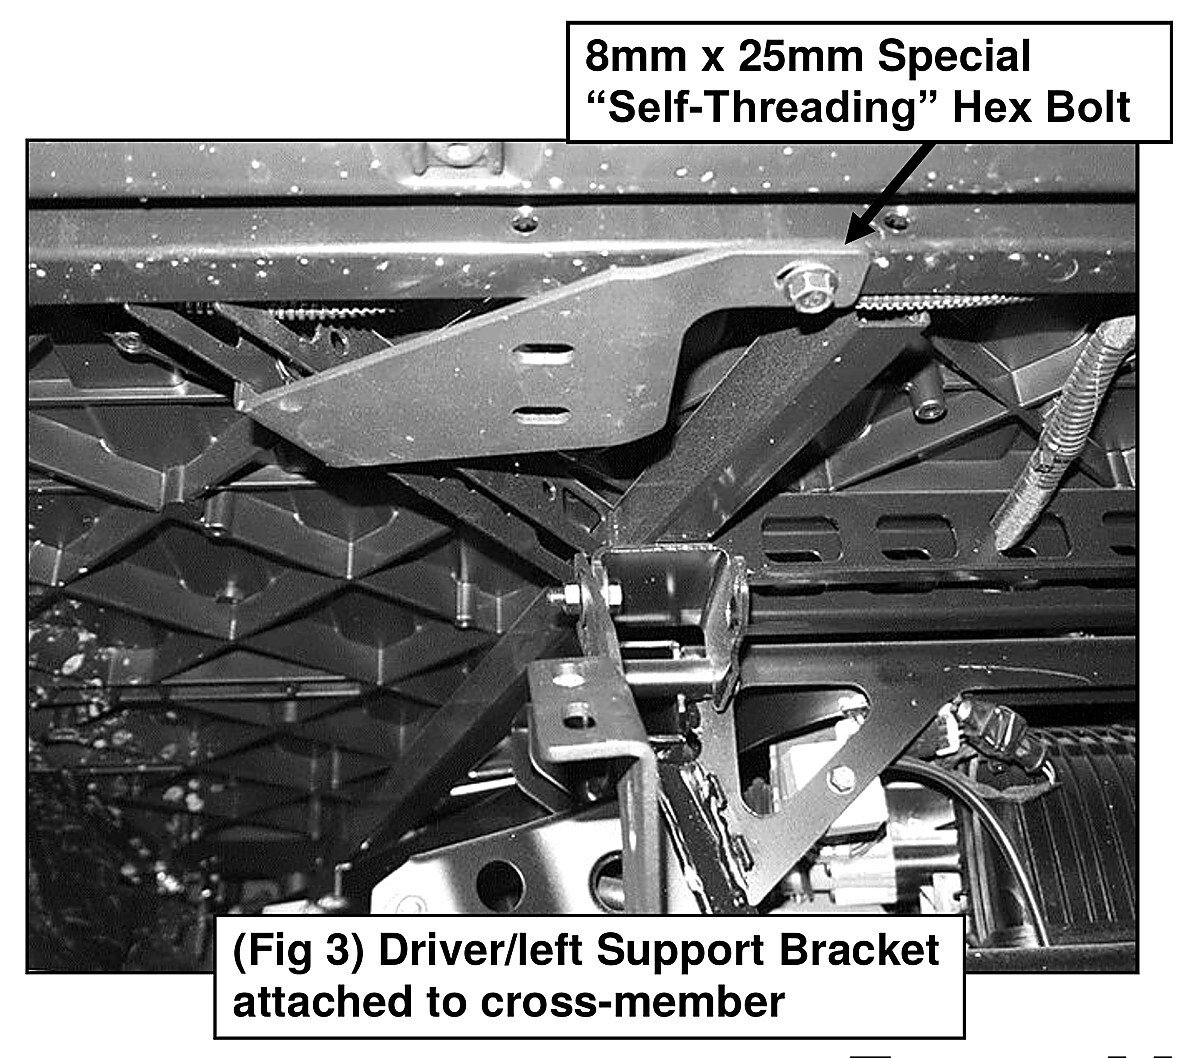
Attach the front tab to the side of the angled brace with two 6mm x 25mm bolts, four flat washers, two lock washers and two nuts. Then run one 8mm x 25mm self-tapping bolt through the bent tab into the hole in the rear crossmember — steady pressure, slow straight start. Leave everything finger tight.
3 Hang the driver-side frame bracket
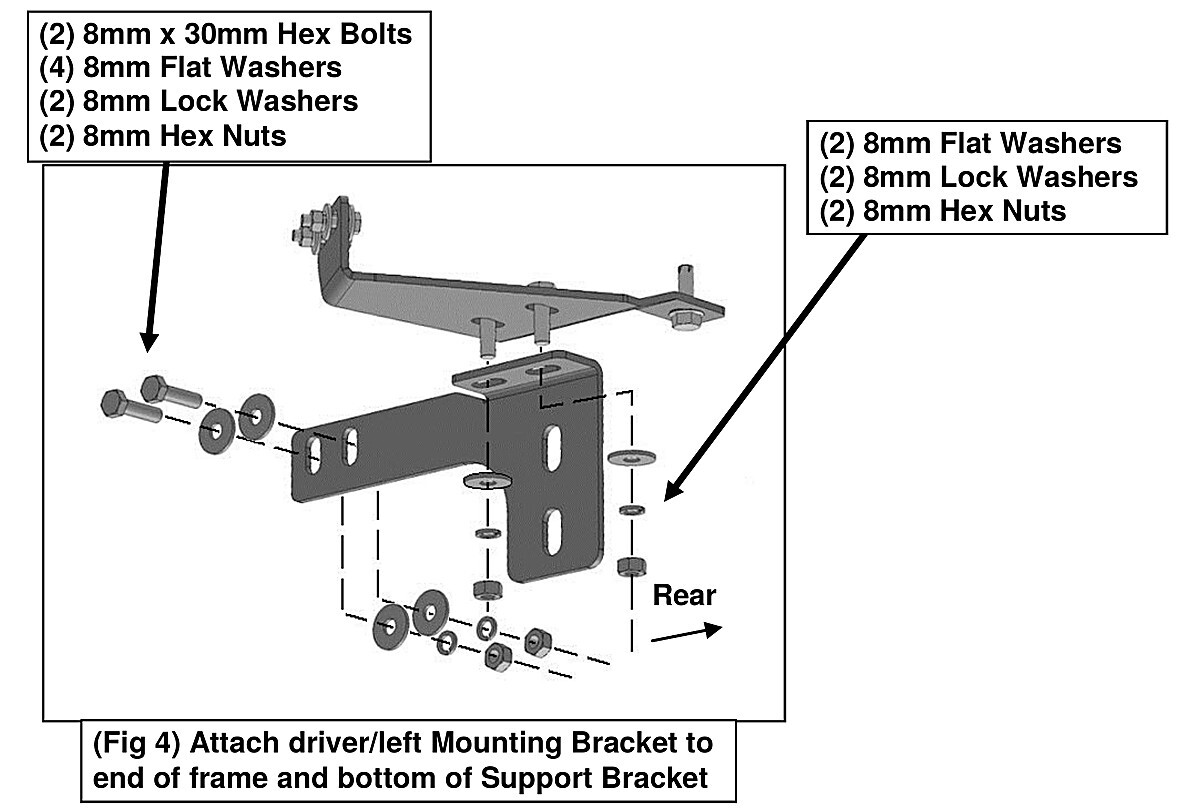
Bolt the front of the frame bracket to the outside end of the bed frame with two 8mm bolts, four flat washers, two lock washers and two nuts. Then tie its rear to the bottom of the support bracket and the double bolt plate studs with two 8mm flat washers, two lock washers and two nuts. Still loose.
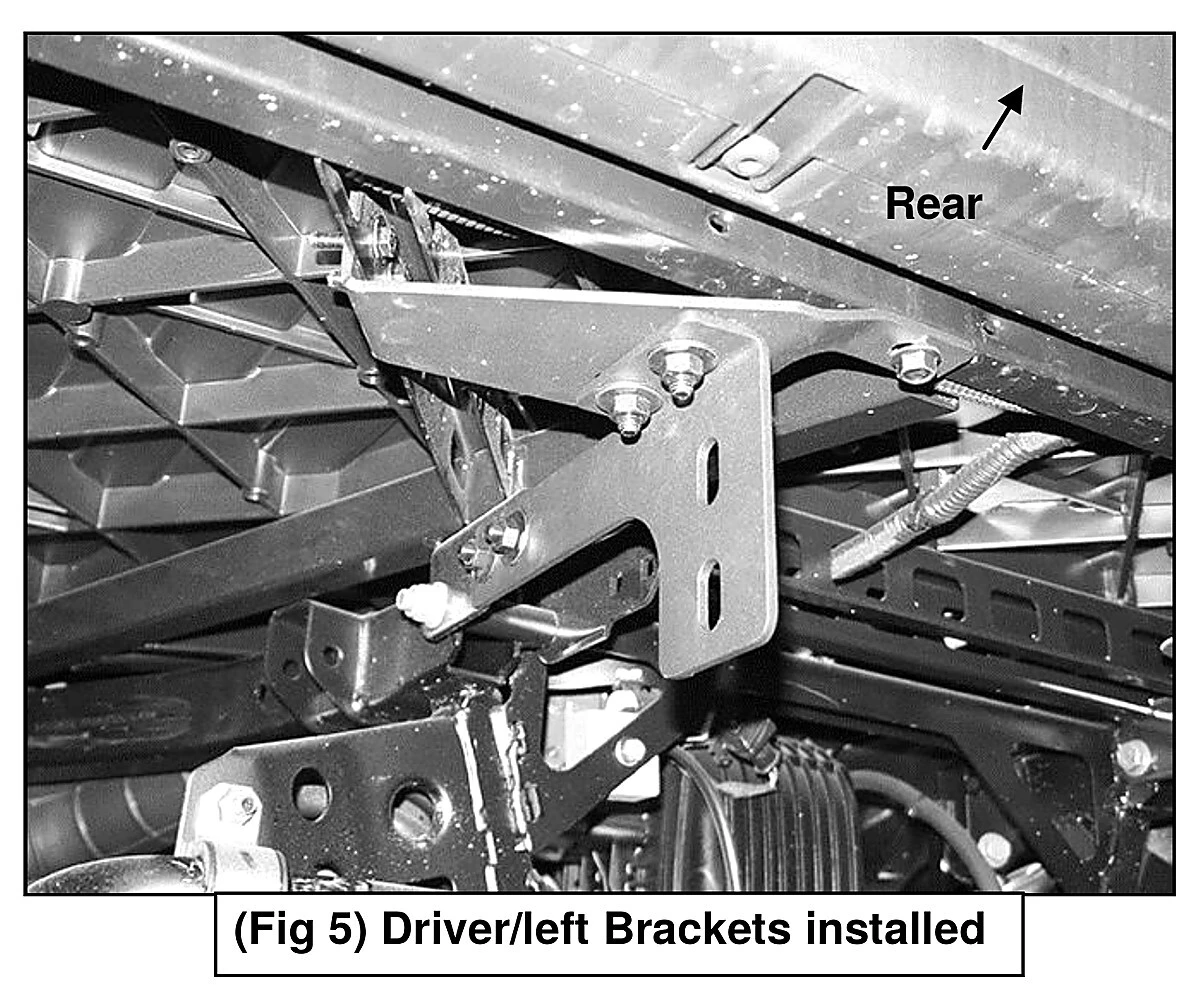
4 Repeat on the passenger side
Same three steps, mirrored. This is the exhaust side — make sure it is cold.
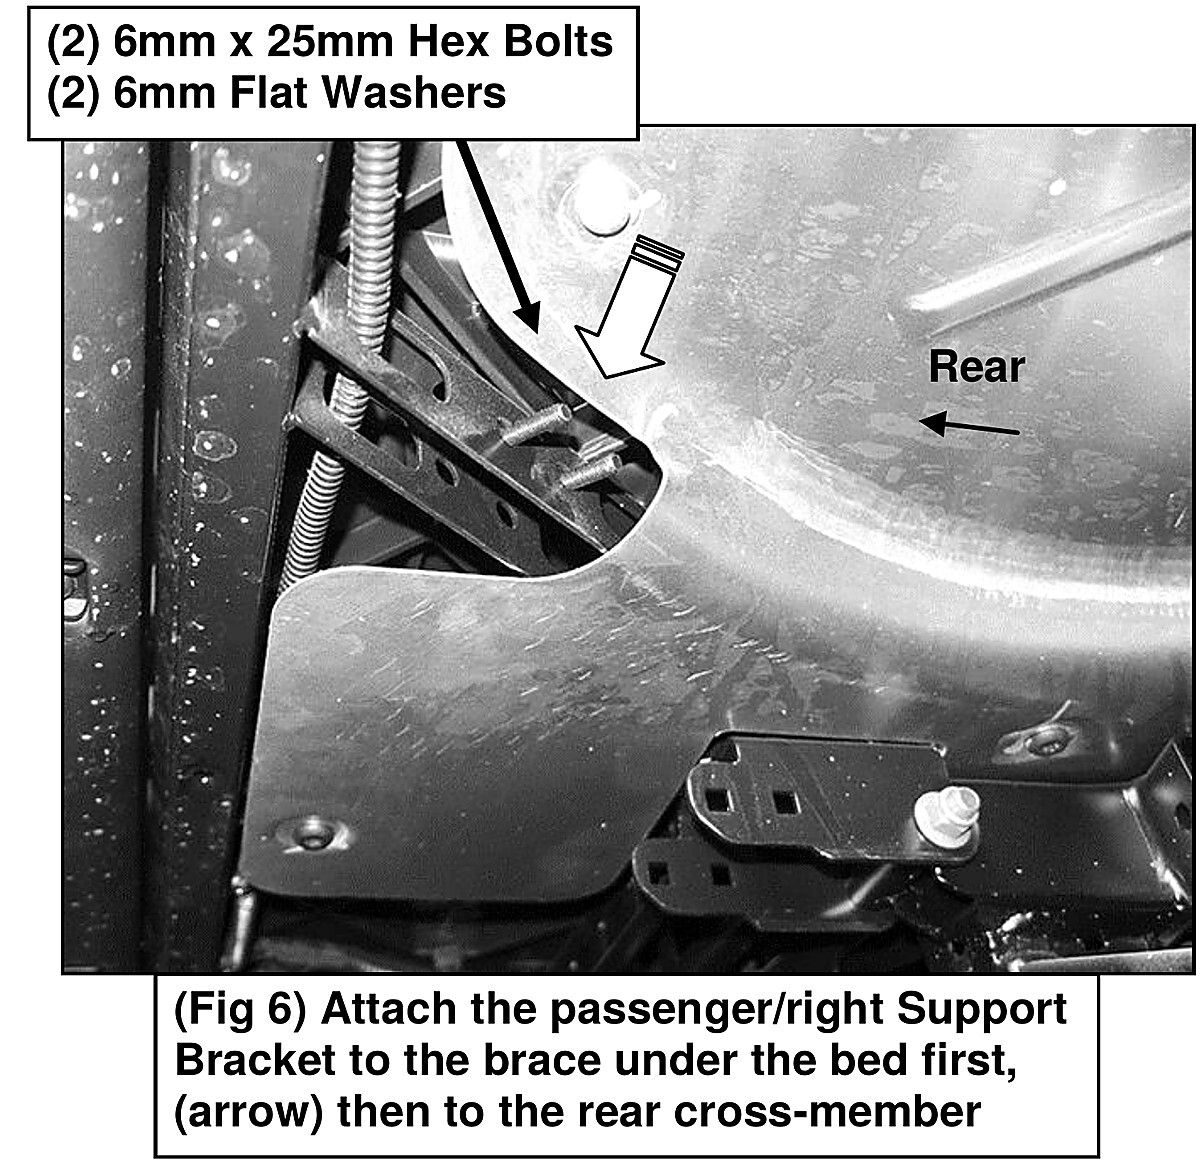
5 Lift the bumper into place
With your helper, bring the bumper up to the outside of the two frame brackets and hold the weight. Don't let go of it and don't start fishing for bolts one-handed — fifty pounds of steel coming down on you or the tailgate is how this turns into a bad afternoon.
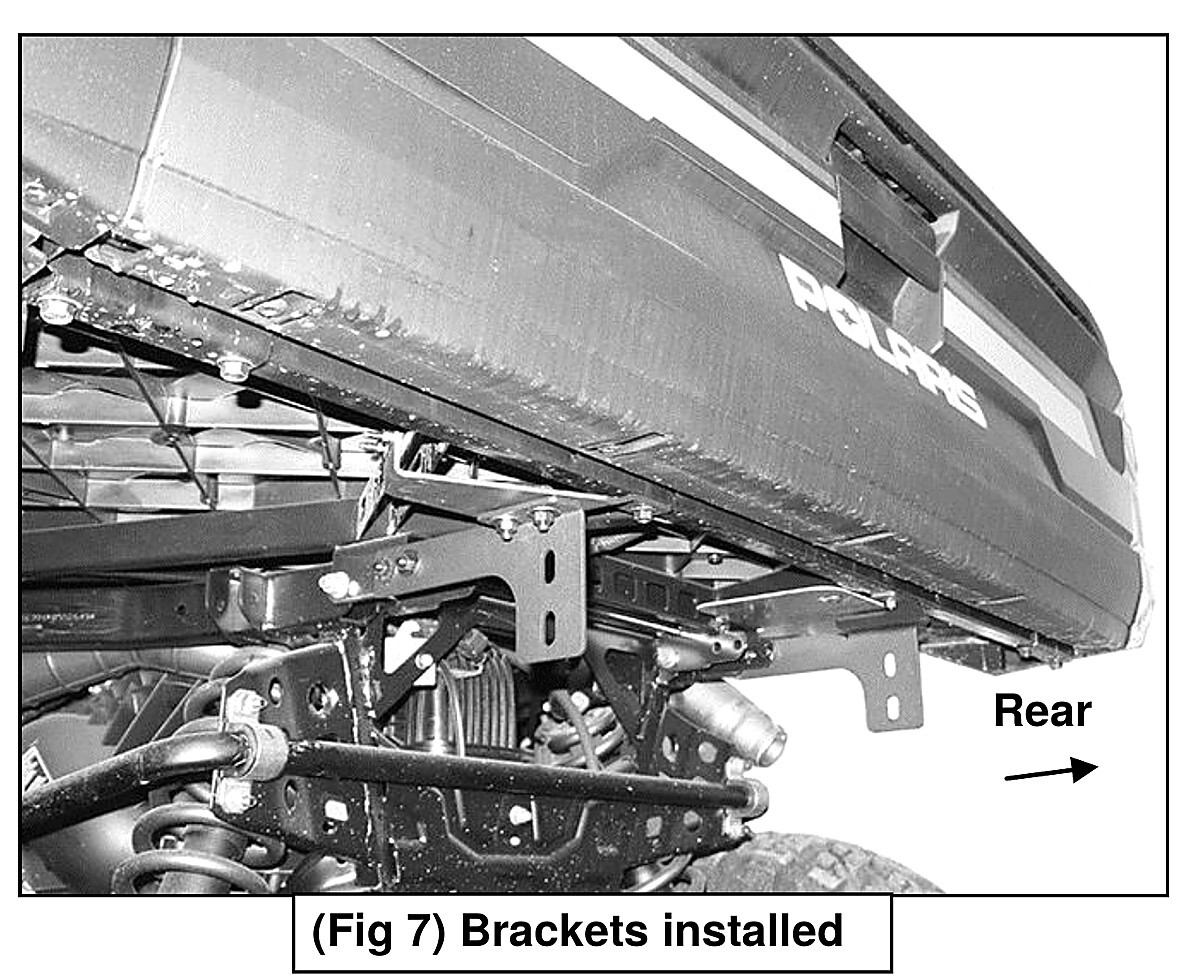
6 Bolt the bumper to the brackets
Driver side first: two 10mm x 30mm bolts, four flat washers, two lock washers, two nuts, through the bumper into the outside of the bracket. Snug, not tight. Repeat on the passenger side.
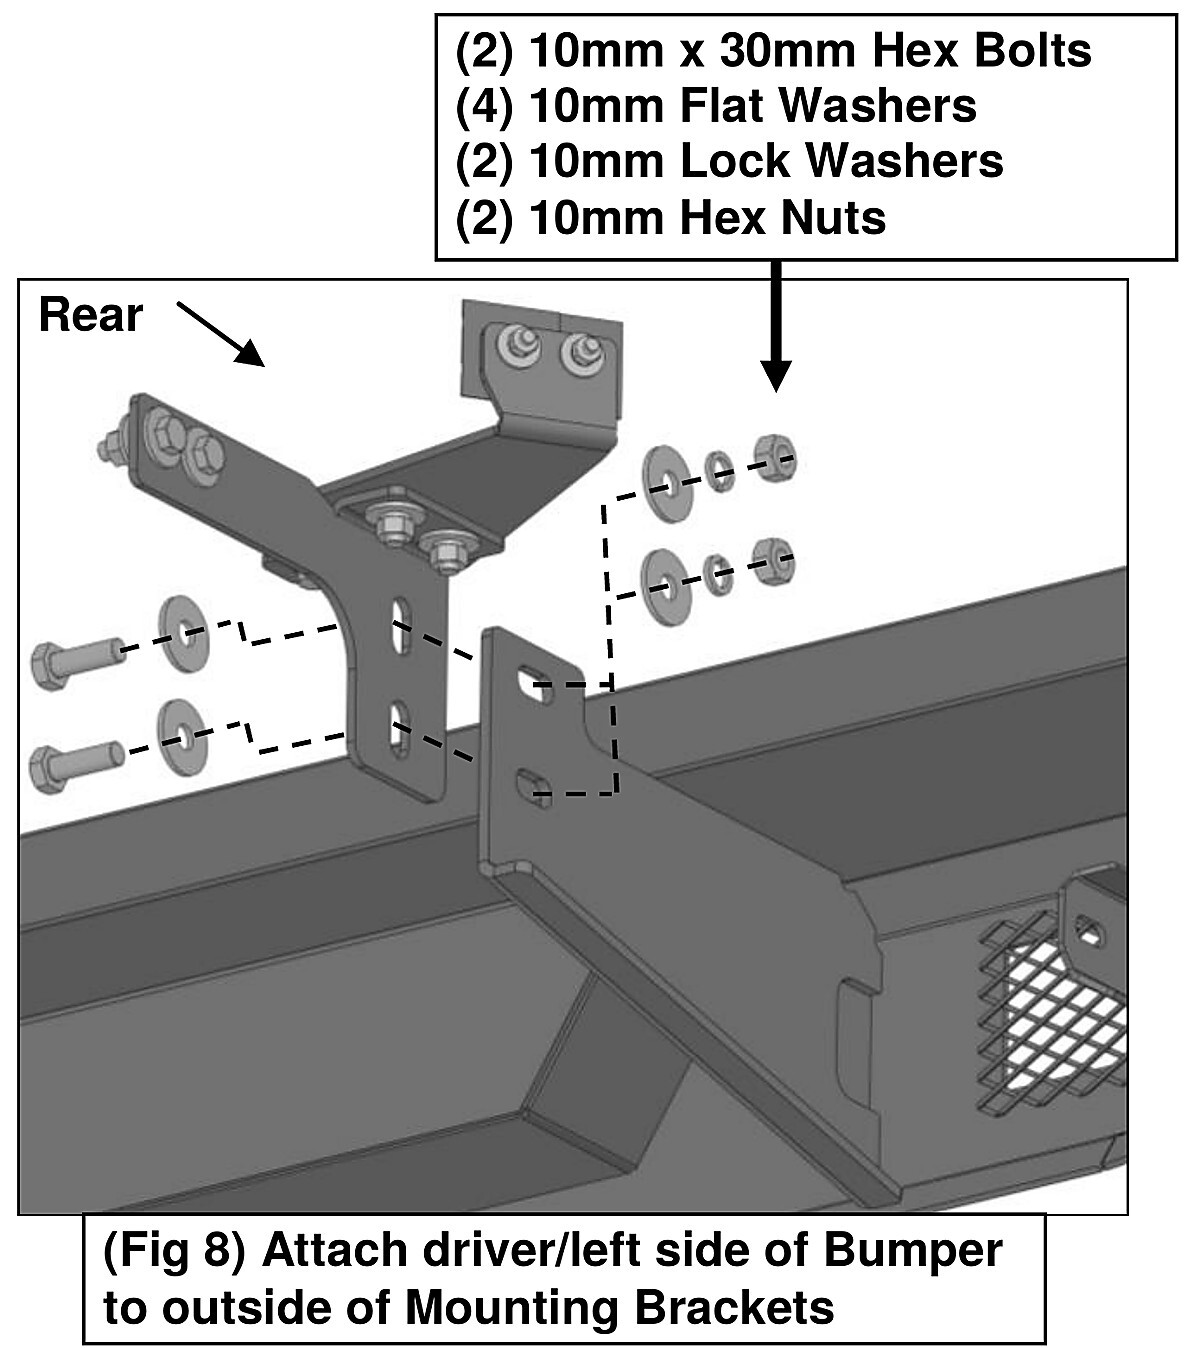
7 Level it, then tighten everything
Eye the bumper against the bed line from both sides and from directly behind. The slotted holes give you room to shift it left, right, up and down. Once the gaps are even and it sits level, work through every fastener you left loose. Then dump the bed and confirm it clears through full travel.
8 Re-check after your first rides
Go back over every bolt, then make it routine. Bolted-on steel on a machine that gets shaken this hard will find any fastener you didn't fully torque.
Accessories & Features
Flush-Mount LED Lights
The removable light plates on the back of the bumper take a pair of flush-mount cubes. Lights aren't included with the bumper, but we sell a rear LED light kit with wiring as an option on the product page — add it at the same time and you can run the wiring before the bumper is fully tightened, which is far easier than going back in later.
D-Ring Shackle Mounts
Integrated shackle mounts give you rated recovery points on both sides. Shackles are sold separately.
Care
Keep abrasive polishes and waxes off the powder coat — they dull the texture finish. Mild soap and water is all it needs.
Troubleshooting & FAQ
The bolts are binding and won't go in straight. What did I do wrong?
You tightened something early. Every fastener in this install stays loose until the bumper is hanging and leveled — back the